

Skip Takeout—Make Chicken Bell Pepper Stir Fry at Home!
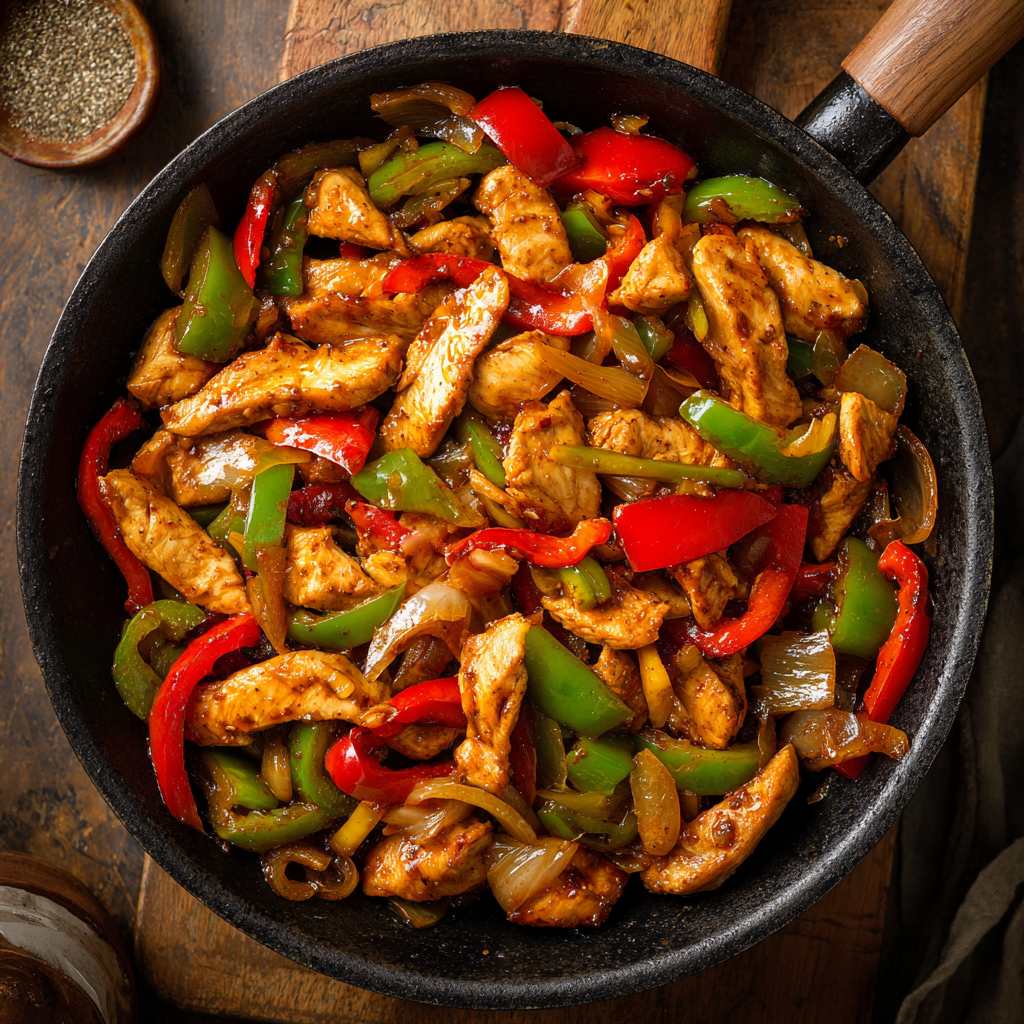
If you’re looking for a fast, healthy, and flavor-packed meal, this Chicken Bell Pepper Stir Fry is a game-changer! Ready in just 25 minutes, it’s perfect for those hectic nights when you want something delicious without a ton of dishes. This stir fry features tender chicken strips, crisp bell peppers, onions, and a savory garlic-ginger sauce that hits all the right notes.
Whether you serve it over rice, noodles, or cauliflower rice, it’s a weeknight winner that’s better than takeout—and much healthier too!
🛒 Ingredients Overview
Here’s what you’ll need to make this vibrant chicken stir fry:
-
1 lb boneless, skinless chicken breast – sliced into thin strips
-
2 tbsp vegetable oil – divided for sautéing
-
1 red bell pepper – sliced
-
1 green bell pepper – sliced
-
1 onion – sliced
-
2 cloves garlic – minced
-
1 tsp fresh ginger – minced (optional but highly recommended!)
-
2 tbsp soy sauce – the salty, umami base
-
1 tbsp oyster sauce – optional, adds rich flavor
-
1 tsp cornstarch + 2 tbsp water – optional, for thickening the sauce
-
Salt & pepper, to taste
-
Cooked rice or noodles – for serving
👩🍳 How to Make Chicken Bell Pepper Stir Fry
Step-by-Step Instructions
1. Prep the Ingredients
Slice the chicken, bell peppers, and onion. Mince garlic and ginger.
2. Heat the Oil
Heat 1 tablespoon of oil in a large skillet or wok over medium-high heat.
3. Cook the Chicken
Add the sliced chicken to the pan. Stir-fry for 5–7 minutes, until fully cooked and lightly golden. Remove and set aside.
4. Stir-Fry the Veggies
Add the remaining oil. Stir in the onion, red and green bell peppers, garlic, and ginger. Cook for 3–4 minutes until tender-crisp.
5. Add Chicken & Sauce
Return the cooked chicken to the pan. Add soy sauce and oyster sauce (if using). Stir to coat evenly.
6. Thicken the Sauce (Optional)
If you prefer a thicker stir fry sauce, stir in the cornstarch slurry and cook for 1–2 minutes until the sauce thickens.
7. Season & Serve
Season with salt and pepper to taste. Serve hot over rice or noodles.
💡 Tips & Variations
-
Use chicken thighs for juicier meat.
-
Add spice with chili flakes or sriracha.
-
No oyster sauce? Substitute with hoisin or skip it entirely.
-
Low-carb option: Serve over cauliflower rice or steamed greens.
-
Add veggies like mushrooms, snap peas, or baby corn for variety.
🧊 Storage & Reheating
-
Store: Refrigerate in an airtight container for up to 4 days.
-
Reheat: Warm in a skillet over medium heat or microwave with a splash of water.
-
Freeze: Not recommended as bell peppers may become mushy when thawed.
❓ FAQs
Can I make this ahead of time?
Yes! Chop your veggies and chicken the night before. Store separately, then cook fresh.
Can I use frozen bell peppers?
Absolutely—just thaw and drain well to avoid excess moisture.
What’s the best way to slice the chicken?
Slice against the grain for tender pieces. Partially freezing it makes slicing easier.
Can I make this gluten-free?
Yes! Use gluten-free soy sauce or tamari.
🥢 Final Thoughts
This Chicken Bell Pepper Stir Fry is the ultimate weeknight dinner—healthy, fast, and full of bold flavors. Once you try it, you’ll skip the takeout menu and whip this up anytime a stir fry craving hits.
👉 If you make this recipe, leave a comment and star rating below! Don’t forget to tag @KimaRecipes on Instagram so I can see your delicious creation!
sive than buying prepared or restaurant-prepared food. When you make your own food, you can often save money by using cheaper ingredients and bulk-buying items that are on sale. You can also save money by reusing ingredients and leftovers, rather than buying new ingredients each time you want to make a dish.
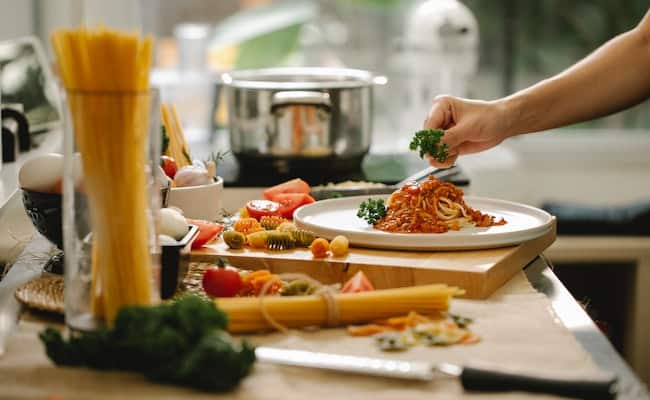
In addition to the financial benefits, homemade recipes can be:
- more satisfying and enjoyable to make and eat
- delicious and nourishing for yourself and others.
- relaxing and therapeutic activity, as it allows you to be creative and engage your senses.
Homemade recipes can also be a great way to bond with friends and family. Inviting others to help with the cooking process or sharing a meal together can be a fun and enjoyable way to spend time together.
Finally, homemade recipes can be more environmentally friendly than store-bought or restaurant-prepared food. When you make your own food, you can reduce the amount of packaging and transportation involved, as well as the energy used to produce and transport the ingredients.

Overall, homemade recipes offer a range of benefits, including better control over ingredients and amounts, cost savings, enjoyment and satisfaction, social connections, and environmental benefits. Whether you are a seasoned cook or just starting out, making your own recipes can be a rewarding and fulfilling experience.
✅ Quick Tips: Read the recipe in its entirety before you start cooking. This will help you understand the ingredients, steps, and timing involved, and allow you to prepare any necessary equipment or ingredients beforehand.
Chicken Bell Pepper Stir Fry
Description
Cheesy Vegan Pizza Beans is a delicious and satisfying vegan dish that is perfect for a quick dinner or a satisfying snack. Made with kidney beans, tomato sauce, and vegan cheese, this dish is packed with protein and flavor.
Ingredients
Instructions
-
Rinse and sort the kidney beans. Soak the beans in a large pot of water for at least 8 hours, or overnight.
-
Drain and rinse the beans. Place them in a large pot and cover with water. Bring to a boil, then reduce the heat to a simmer and cook for 1 hour, or until the beans are tender.
-
Preheat the oven to 375°F (190°C) 🔥.
-
Heat the olive oil in a large skillet over medium heat. Add the onion 🧅, bell pepper, and garlic 🧄, and cook for 5 minutes, or until the vegetables are tender.
-
Add the oregano, basil, salt 🧂, and black pepper, and stir to combine.
-
Add the tomato sauce 🍅 and cooked beans to the skillet and stir to combine.
-
Spread the bean mixture in an even layer on a baking sheet. Sprinkle the vegan cheese 🧀 shreds and vegan parmesan cheese on top.
-
Bake for 10-15 minutes 🕒, or until the cheese is melted and bubbly.
-
Serve hot ♨ and enjoy!

Nutrition Facts
Servings 1
- Amount Per Serving
- Calories 386kcal
- % Daily Value *
- Total Fat 16.7g26%
- Saturated Fat 2.4g12%
- Total Carbohydrate 56.5g19%
- Sugars 7.5g
- Protein 18.2g37%
- Vitamin A 302 IU
- Vitamin C 12 mg
- Calcium 135 mg
- Iron 7 mg
* Percent Daily Values are based on a 2,000 calorie diet. Your daily value may be higher or lower depending on your calorie needs.
Note
You can also use other types of beans in this recipe, such as black beans or pinto beans.
Feel free to get creative and add your favorite pizza toppings to the mix!
