
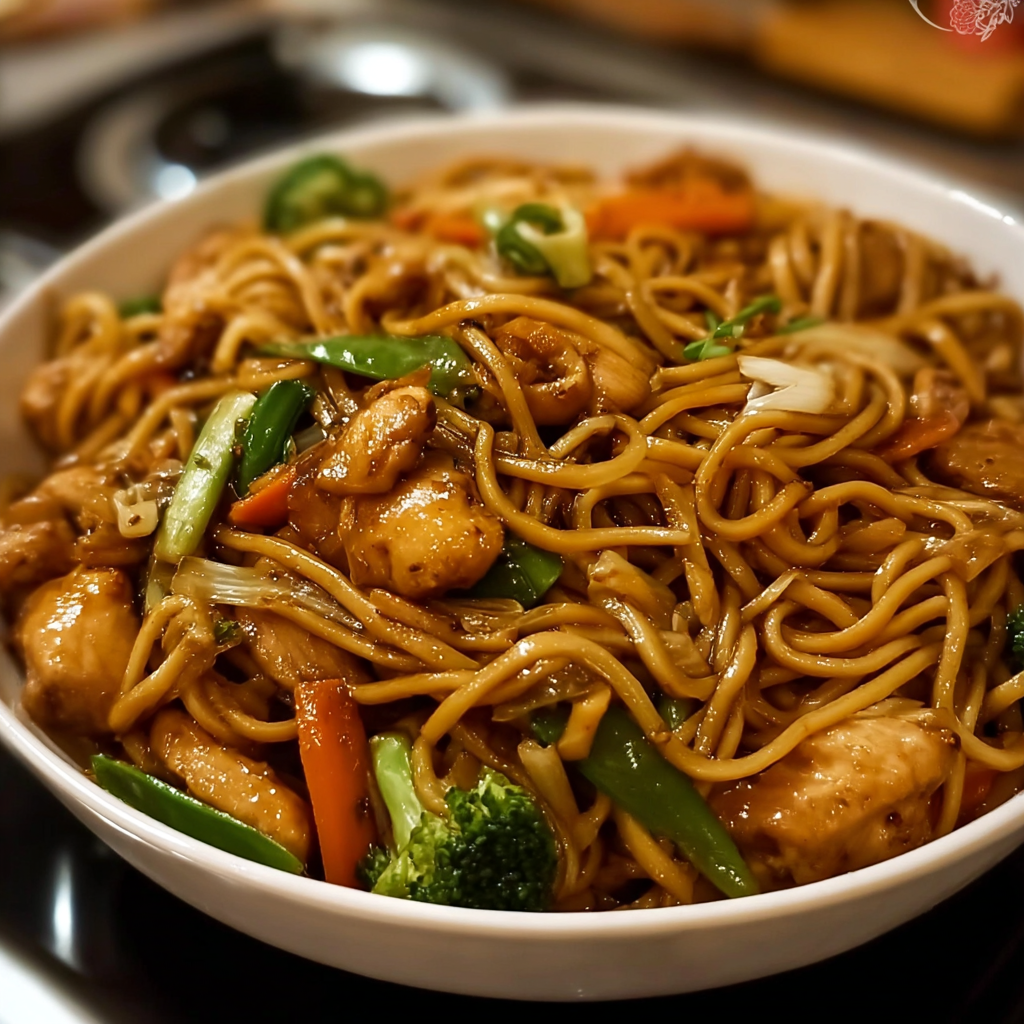
Skip Takeout & Make Garlic Chicken Lo Mein at Home
Craving takeout but want something fresher and faster? This Garlic Chicken Lo Mein is just what your weeknight dinner rotation needs! It’s packed with tender chicken, colorful veggies, and lo mein noodles tossed in a savory garlic-soy sauce that’s full of umami goodness.
Not only is it quicker than ordering out—it’s also healthier and super customizable. Whether you’re feeding a hungry family or meal prepping for the week, this easy lo mein recipe is guaranteed to satisfy!
Ingredients You’ll Need
Here’s a breakdown of what you’ll need to make this delicious garlic chicken lo mein:
-
8 oz lo mein noodles
-
2 tbsp vegetable oil, divided
-
1 lb chicken breast, thinly sliced
-
3 cloves garlic, minced
-
2 cups mixed vegetables (carrots, bell peppers, broccoli, etc.)
-
1/4 cup soy sauce
-
2 tbsp oyster-flavored sauce
-
1 tbsp hoisin sauce
-
1 tsp sesame oil
-
Salt and pepper, to taste
-
Green onions, sliced (for garnish)
Tip: Use fresh or frozen stir-fry veggies—whatever you have on hand!
How to Make Garlic Chicken Lo Mein
Step-by-Step Instructions:
-
Cook the Noodles
Bring a large pot of water to a boil. Cook lo mein noodles according to package directions. Drain and set aside. -
Cook the Chicken
In a large skillet or wok, heat 1 tbsp vegetable oil over medium-high heat. Add sliced chicken and stir-fry for 5–6 minutes until browned and fully cooked. Transfer to a plate. -
Sauté Garlic
Add the remaining 1 tbsp oil to the skillet. Add minced garlic and cook for about 1 minute until fragrant. -
Stir-Fry Veggies
Add your choice of mixed vegetables to the pan. Stir-fry for 3–4 minutes until tender-crisp. -
Prepare the Sauce
In a small bowl, whisk together the soy sauce, oyster-flavored sauce, hoisin sauce, and sesame oil. -
Combine Everything
Return the chicken and noodles to the skillet. Pour the sauce over everything and toss to coat. -
Finish Cooking
Stir-fry everything together for another 2–3 minutes until well combined. Taste and adjust with salt and pepper if needed. -
Serve
Plate and garnish with sliced green onions. Serve hot and enjoy!
Variations & Substitutions
-
Noodles: Can’t find lo mein? Substitute with spaghetti, udon, or yakisoba noodles.
-
Protein Swap: Use shrimp, beef, or tofu for a different twist.
-
Vegetable Options: Snow peas, cabbage, mushrooms, or spinach work well too.
-
Make it spicy: Add sriracha, red pepper flakes, or chili oil to the sauce.
Storage & Reheating
-
Refrigerator: Store leftovers in an airtight container for up to 4 days.
-
Freezer: Freeze portions for up to 2 months (just note the noodles may soften slightly).
-
To Reheat: Microwave with a splash of water or reheat in a skillet over medium heat.
❓ Frequently Asked Questions
Can I use pre-cooked chicken?
Yes! Just add it when tossing everything together with the sauce.
Can I make this gluten-free?
Absolutely—just use gluten-free soy sauce and gluten-free noodles.
What’s the difference between lo mein and chow mein?
Lo mein uses softer, boiled noodles, while chow mein uses crispy fried noodles.
Can I make this ahead?
Yes! Make the sauce and prep ingredients in advance. Cook everything fresh in under 15 minutes.
Final Thoughts + Call to Action
This Garlic Chicken Lo Mein is a total game-changer for anyone who wants quick, flavorful meals without sacrificing quality. Whether you’re meal-prepping or serving a crowd, this dish delivers comfort and flavor in every bite.
👉 Tried this recipe? Leave a comment and rating below, and don’t forget to tag @KimaRecipes on Instagram with your lo mein masterpiece!

Easy Garlic Chicken Lo Mein
Description
Cheesy Vegan Pizza Beans is a delicious and satisfying vegan dish that is perfect for a quick dinner or a satisfying snack. Made with kidney beans, tomato sauce, and vegan cheese, this dish is packed with protein and flavor.
Ingredients
Instructions
-
Rinse and sort the kidney beans. Soak the beans in a large pot of water for at least 8 hours, or overnight.

-
Drain and rinse the beans. Place them in a large pot and cover with water. Bring to a boil, then reduce the heat to a simmer and cook for 1 hour, or until the beans are tender.
-
Preheat the oven to 375°F (190°C) 🔥.
-
Heat the olive oil in a large skillet over medium heat. Add the onion 🧅, bell pepper, and garlic 🧄, and cook for 5 minutes, or until the vegetables are tender.

-
Add the oregano, basil, salt 🧂, and black pepper, and stir to combine.
-
Add the tomato sauce 🍅 and cooked beans to the skillet and stir to combine.
-
Spread the bean mixture in an even layer on a baking sheet. Sprinkle the vegan cheese 🧀 shreds and vegan parmesan cheese on top.
-
Bake for 10-15 minutes 🕒, or until the cheese is melted and bubbly.
-
Serve hot ♨ and enjoy!

Nutrition Facts
Servings 1
- Amount Per Serving
- Calories 386kcal
- % Daily Value *
- Total Fat 16.7g26%
- Saturated Fat 2.4g12%
- Total Carbohydrate 56.5g19%
- Sugars 7.5g
- Protein 18.2g37%
- Vitamin A 302 IU
- Vitamin C 12 mg
- Calcium 135 mg
- Iron 7 mg
* Percent Daily Values are based on a 2,000 calorie diet. Your daily value may be higher or lower depending on your calorie needs.
Note
You can also use other types of beans in this recipe, such as black beans or pinto beans.
Feel free to get creative and add your favorite pizza toppings to the mix!
