

Introduction
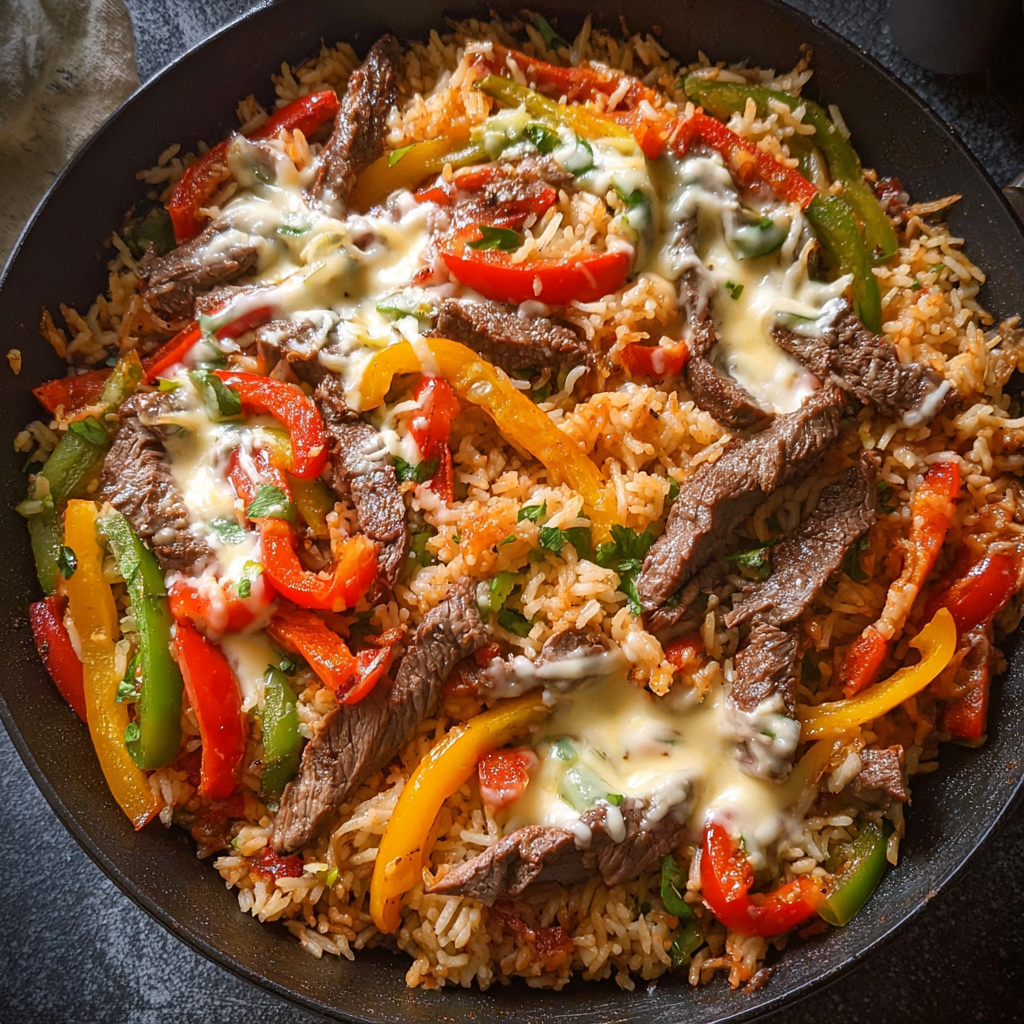
Looking for a weeknight dinner that’s packed with bold flavors, made in just one pan, and guaranteed to satisfy the whole family? This queso steak fajita skillet is the ultimate comfort meal. Loaded with tender sirloin steak, sautéed peppers, fluffy rice, and creamy queso, it brings together everything you love about Tex-Mex in one sizzling skillet.
It’s quick, hearty, and cheesy in all the right ways. Plus, cleanup is a breeze thanks to the one-pan method!
Ingredient Overview
Here’s what you’ll need to bring this cheesy fajita skillet to life:
-
Top Sirloin Steak: Sliced into strips for quick searing.
-
Bell Peppers (3): Choose a colorful mix—green, red, and yellow—for flavor and visual appeal.
-
Yellow Onion: Adds sweet, aromatic depth.
-
Fajita Seasoning Packet: All the Tex-Mex flavor in one step.
-
Minute Rice: Quick-cooking rice that simplifies everything.
-
Chicken Broth: Adds moisture and flavor to cook the rice.
-
Tomato Sauce: Infuses the rice with richness and a touch of acidity.
-
Olive Oil: For sautéing.
-
Gordo’s Cheese Dip (or your favorite queso): The melty, creamy topper that makes this dish extra indulgent.
Step-by-Step Instructions
How to Make Queso Steak Fajita Skillet
-
Cook the Vegetables & Steak
Heat 2 tablespoons of olive oil in a large skillet over medium-high heat. Add the diced onion and sliced bell peppers. Sauté for 2–3 minutes until they begin to soften. Add 1 lb of steak strips and sprinkle with 1 packet of fajita seasoning. Sear the steak until cooked to your preference. -
Add Rice, Broth & Tomato Sauce
Stir in 2 cups of Minute Rice, 2 cups of chicken broth, and 8 oz of tomato sauce. Mix well to combine everything evenly. -
Simmer Until Rice is Done
Bring the skillet to a simmer and cook according to the rice package instructions (typically about 5–10 minutes for Minute Rice), until the rice is tender and liquid is absorbed. -
Add the Queso
Generously spoon Gordo’s cheese dip over the hot skillet. Let it melt into the steak and rice mixture, creating a gooey, cheesy finish. -
Serve Hot
Dish onto plates and serve immediately while hot and melty. Garnish with fresh cilantro, jalapeños, or extra cheese if desired.
Helpful Tips and Variations
-
Use leftover steak or grilled chicken to make it even faster.
-
Swap the queso: Gordo’s is great, but Velveeta or homemade queso blanco works too.
-
Add beans or corn to stretch the recipe and add texture.
-
Make it spicy: Add sliced jalapeños, chipotle powder, or hot sauce.
Storage & Reheating
-
Refrigerate: Store leftovers in an airtight container for up to 3 days.
-
Reheat: Warm in a skillet with a splash of broth or in the microwave. Stir occasionally to avoid dry spots.
-
Freezing not recommended due to the dairy-based queso, which can separate upon thawing.
Frequently Asked Questions
Can I use regular rice instead of Minute Rice?
Yes, but you’ll need to adjust the liquid ratio and cooking time. Regular long-grain rice may take 15–20 minutes.
Is this dish spicy?
Not by default, but you can add red pepper flakes, jalapeños, or hot sauce if you like heat.
What kind of steak is best?
Top sirloin is affordable and tender when cooked quickly, but flank steak or skirt steak also work well.
Can I make this vegetarian?
Sure! Omit the steak and add black beans, extra peppers, and corn for a veggie version.
Conclusion
This queso steak fajita skillet is your go-to for a quick, cheesy, and flavor-packed Tex-Mex dinner. It comes together in one pan, making cleanup easy—and it’s always a crowd-pleaser. Perfect for weeknights, casual gatherings, or just when you’re craving steak and cheese.
Give it a try and let us know how it turned out in the comments below! Share your version on social media and tag us—because this skillet deserves to be seen (and devoured).
Cheesy Queso Steak Fajita Skillet
Description
Cheesy Vegan Pizza Beans is a delicious and satisfying vegan dish that is perfect for a quick dinner or a satisfying snack. Made with kidney beans, tomato sauce, and vegan cheese, this dish is packed with protein and flavor.
Ingredients
Instructions
-
Rinse and sort the kidney beans. Soak the beans in a large pot of water for at least 8 hours, or overnight.

-
Drain and rinse the beans. Place them in a large pot and cover with water. Bring to a boil, then reduce the heat to a simmer and cook for 1 hour, or until the beans are tender.
-
Preheat the oven to 375°F (190°C) 🔥.
-
Heat the olive oil in a large skillet over medium heat. Add the onion 🧅, bell pepper, and garlic 🧄, and cook for 5 minutes, or until the vegetables are tender.
-
Add the oregano, basil, salt 🧂, and black pepper, and stir to combine.
-
Add the tomato sauce 🍅 and cooked beans to the skillet and stir to combine.
-
Spread the bean mixture in an even layer on a baking sheet. Sprinkle the vegan cheese 🧀 shreds and vegan parmesan cheese on top.
-
Bake for 10-15 minutes 🕒, or until the cheese is melted and bubbly.
-
Serve hot ♨ and enjoy!

Nutrition Facts
Servings 1
- Amount Per Serving
- Calories 386kcal
- % Daily Value *
- Total Fat 16.7g26%
- Saturated Fat 2.4g12%
- Total Carbohydrate 56.5g19%
- Sugars 7.5g
- Protein 18.2g37%
- Vitamin A 302 IU
- Vitamin C 12 mg
- Calcium 135 mg
- Iron 7 mg
* Percent Daily Values are based on a 2,000 calorie diet. Your daily value may be higher or lower depending on your calorie needs.
Note
You can also use other types of beans in this recipe, such as black beans or pinto beans.
Feel free to get creative and add your favorite pizza toppings to the mix!
