


Introduction
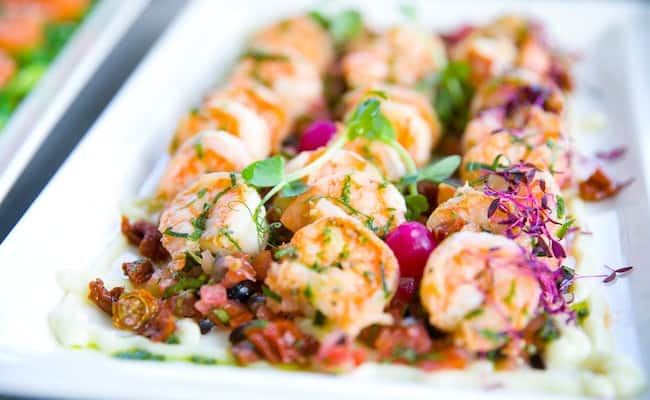
If you’re craving a quick dinner that’s full of flavor and elegance, this Skillet Garlic Butter Shrimp is exactly what you need. Ready in just 15 minutes, this recipe is perfect for busy weeknights when you want something simple, savory, and downright satisfying. With juicy shrimp swimming in a rich garlic butter sauce, it’s a dish that feels gourmet but couldn’t be easier to make.
Whether you serve it over rice, pasta, or with crusty bread to mop up the sauce, this recipe will become one of your go-to meals.
Ingredient Overview
Here’s everything you’ll need for this buttery, garlicky skillet shrimp:
-
Large Shrimp: Peeled and deveined for convenience.
-
Unsalted Butter: The rich base of the sauce.
-
Fresh Garlic: Minced for bold, aromatic flavor.
-
Red Pepper Flakes (optional): Add a subtle kick of heat.
-
Salt and Black Pepper: For balanced seasoning.
-
Fresh Lemon Juice: Brightens up the butter and complements the shrimp.
-
Chopped Fresh Parsley: Adds freshness and color.
-
Cooked Rice or Pasta: Perfect for soaking up all that delicious garlic butter.
Step-by-Step Instructions
How to Make Garlic Butter Shrimp in a Skillet
-
Melt the Butter
In a large skillet over medium heat, melt 4 tablespoons of unsalted butter. -
Sauté the Garlic
Add 4 cloves of minced garlic and 1 teaspoon of red pepper flakes (if using). Sauté for 1–2 minutes until fragrant, being careful not to brown the garlic. -
Cook the Shrimp
Add 1 pound of shrimp in a single layer. Season with salt and pepper. Cook for 2–3 minutes on one side until they turn pink and begin to curl. -
Flip and Finish
Flip the shrimp and cook for another 1–2 minutes until opaque and fully cooked. -
Add Lemon and Parsley
Squeeze in the juice of 1 lemon and sprinkle with 2 tablespoons of chopped parsley. Toss gently to coat. -
Serve Immediately
Serve hot over cooked rice or pasta, spooning the remaining garlic butter sauce over the top.
Helpful Tips and Variations
-
Use fresh or frozen shrimp. Just be sure frozen shrimp are fully thawed before cooking.
-
Don’t overcook the shrimp. Once they turn pink and curl, they’re done.
-
Try other herbs. Basil, dill, or cilantro can be great alternatives to parsley.
-
Make it creamy. Add a splash of heavy cream after cooking the shrimp for a richer sauce.
Storage and Reheating
-
Refrigerate leftovers in an airtight container for up to 2 days.
-
Reheat gently in a skillet over low heat with a splash of water or broth to prevent drying.
-
Not recommended for freezing once cooked, as shrimp can become rubbery.
Frequently Asked Questions
Can I use pre-cooked shrimp?
Yes, but add them at the very end just to warm through—overcooking can make them rubbery.
Can I make this dairy-free?
Use olive oil or dairy-free butter alternatives, though the flavor will change slightly.
What’s the best shrimp size for this recipe?
Large or extra-large shrimp work best—they’re juicy and easier to cook evenly.
Can I serve this as an appetizer?
Absolutely. Serve in small bowls with toothpicks and crusty bread for dipping.
Conclusion
This Skillet Garlic Butter Shrimp is a lightning-fast dinner packed with bold garlic flavor and buttery goodness. It’s elegant enough for entertaining but easy enough for a Tuesday night. Once you try it, you’ll find yourself coming back to it again and again.
If you loved this recipe, leave a comment below, share it on social media, or bookmark it for later. Let us know how you served yours!
Skillet Garlic Butter Shrimp
Description
Cheesy Vegan Pizza Beans is a delicious and satisfying vegan dish that is perfect for a quick dinner or a satisfying snack. Made with kidney beans, tomato sauce, and vegan cheese, this dish is packed with protein and flavor.
Ingredients
Instructions
-
Rinse and sort the kidney beans. Soak the beans in a large pot of water for at least 8 hours, or overnight.
-
Drain and rinse the beans. Place them in a large pot and cover with water. Bring to a boil, then reduce the heat to a simmer and cook for 1 hour, or until the beans are tender.
-
Preheat the oven to 375°F (190°C) 🔥.
-
Heat the olive oil in a large skillet over medium heat. Add the onion 🧅, bell pepper, and garlic 🧄, and cook for 5 minutes, or until the vegetables are tender.
-
Add the oregano, basil, salt 🧂, and black pepper, and stir to combine.
-
Add the tomato sauce 🍅 and cooked beans to the skillet and stir to combine.
-
Spread the bean mixture in an even layer on a baking sheet. Sprinkle the vegan cheese 🧀 shreds and vegan parmesan cheese on top.
-
Bake for 10-15 minutes 🕒, or until the cheese is melted and bubbly.
-
Serve hot ♨ and enjoy!

Nutrition Facts
Servings 1
- Amount Per Serving
- Calories 386kcal
- % Daily Value *
- Total Fat 16.7g26%
- Saturated Fat 2.4g12%
- Total Carbohydrate 56.5g19%
- Sugars 7.5g
- Protein 18.2g37%
- Vitamin A 302 IU
- Vitamin C 12 mg
- Calcium 135 mg
- Iron 7 mg
* Percent Daily Values are based on a 2,000 calorie diet. Your daily value may be higher or lower depending on your calorie needs.
Note
You can also use other types of beans in this recipe, such as black beans or pinto beans.
Feel free to get creative and add your favorite pizza toppings to the mix!
