The Best Fluffy Pancakes recipe you will fall in love with. Full of tips and tricks to help you make the best pancakes.

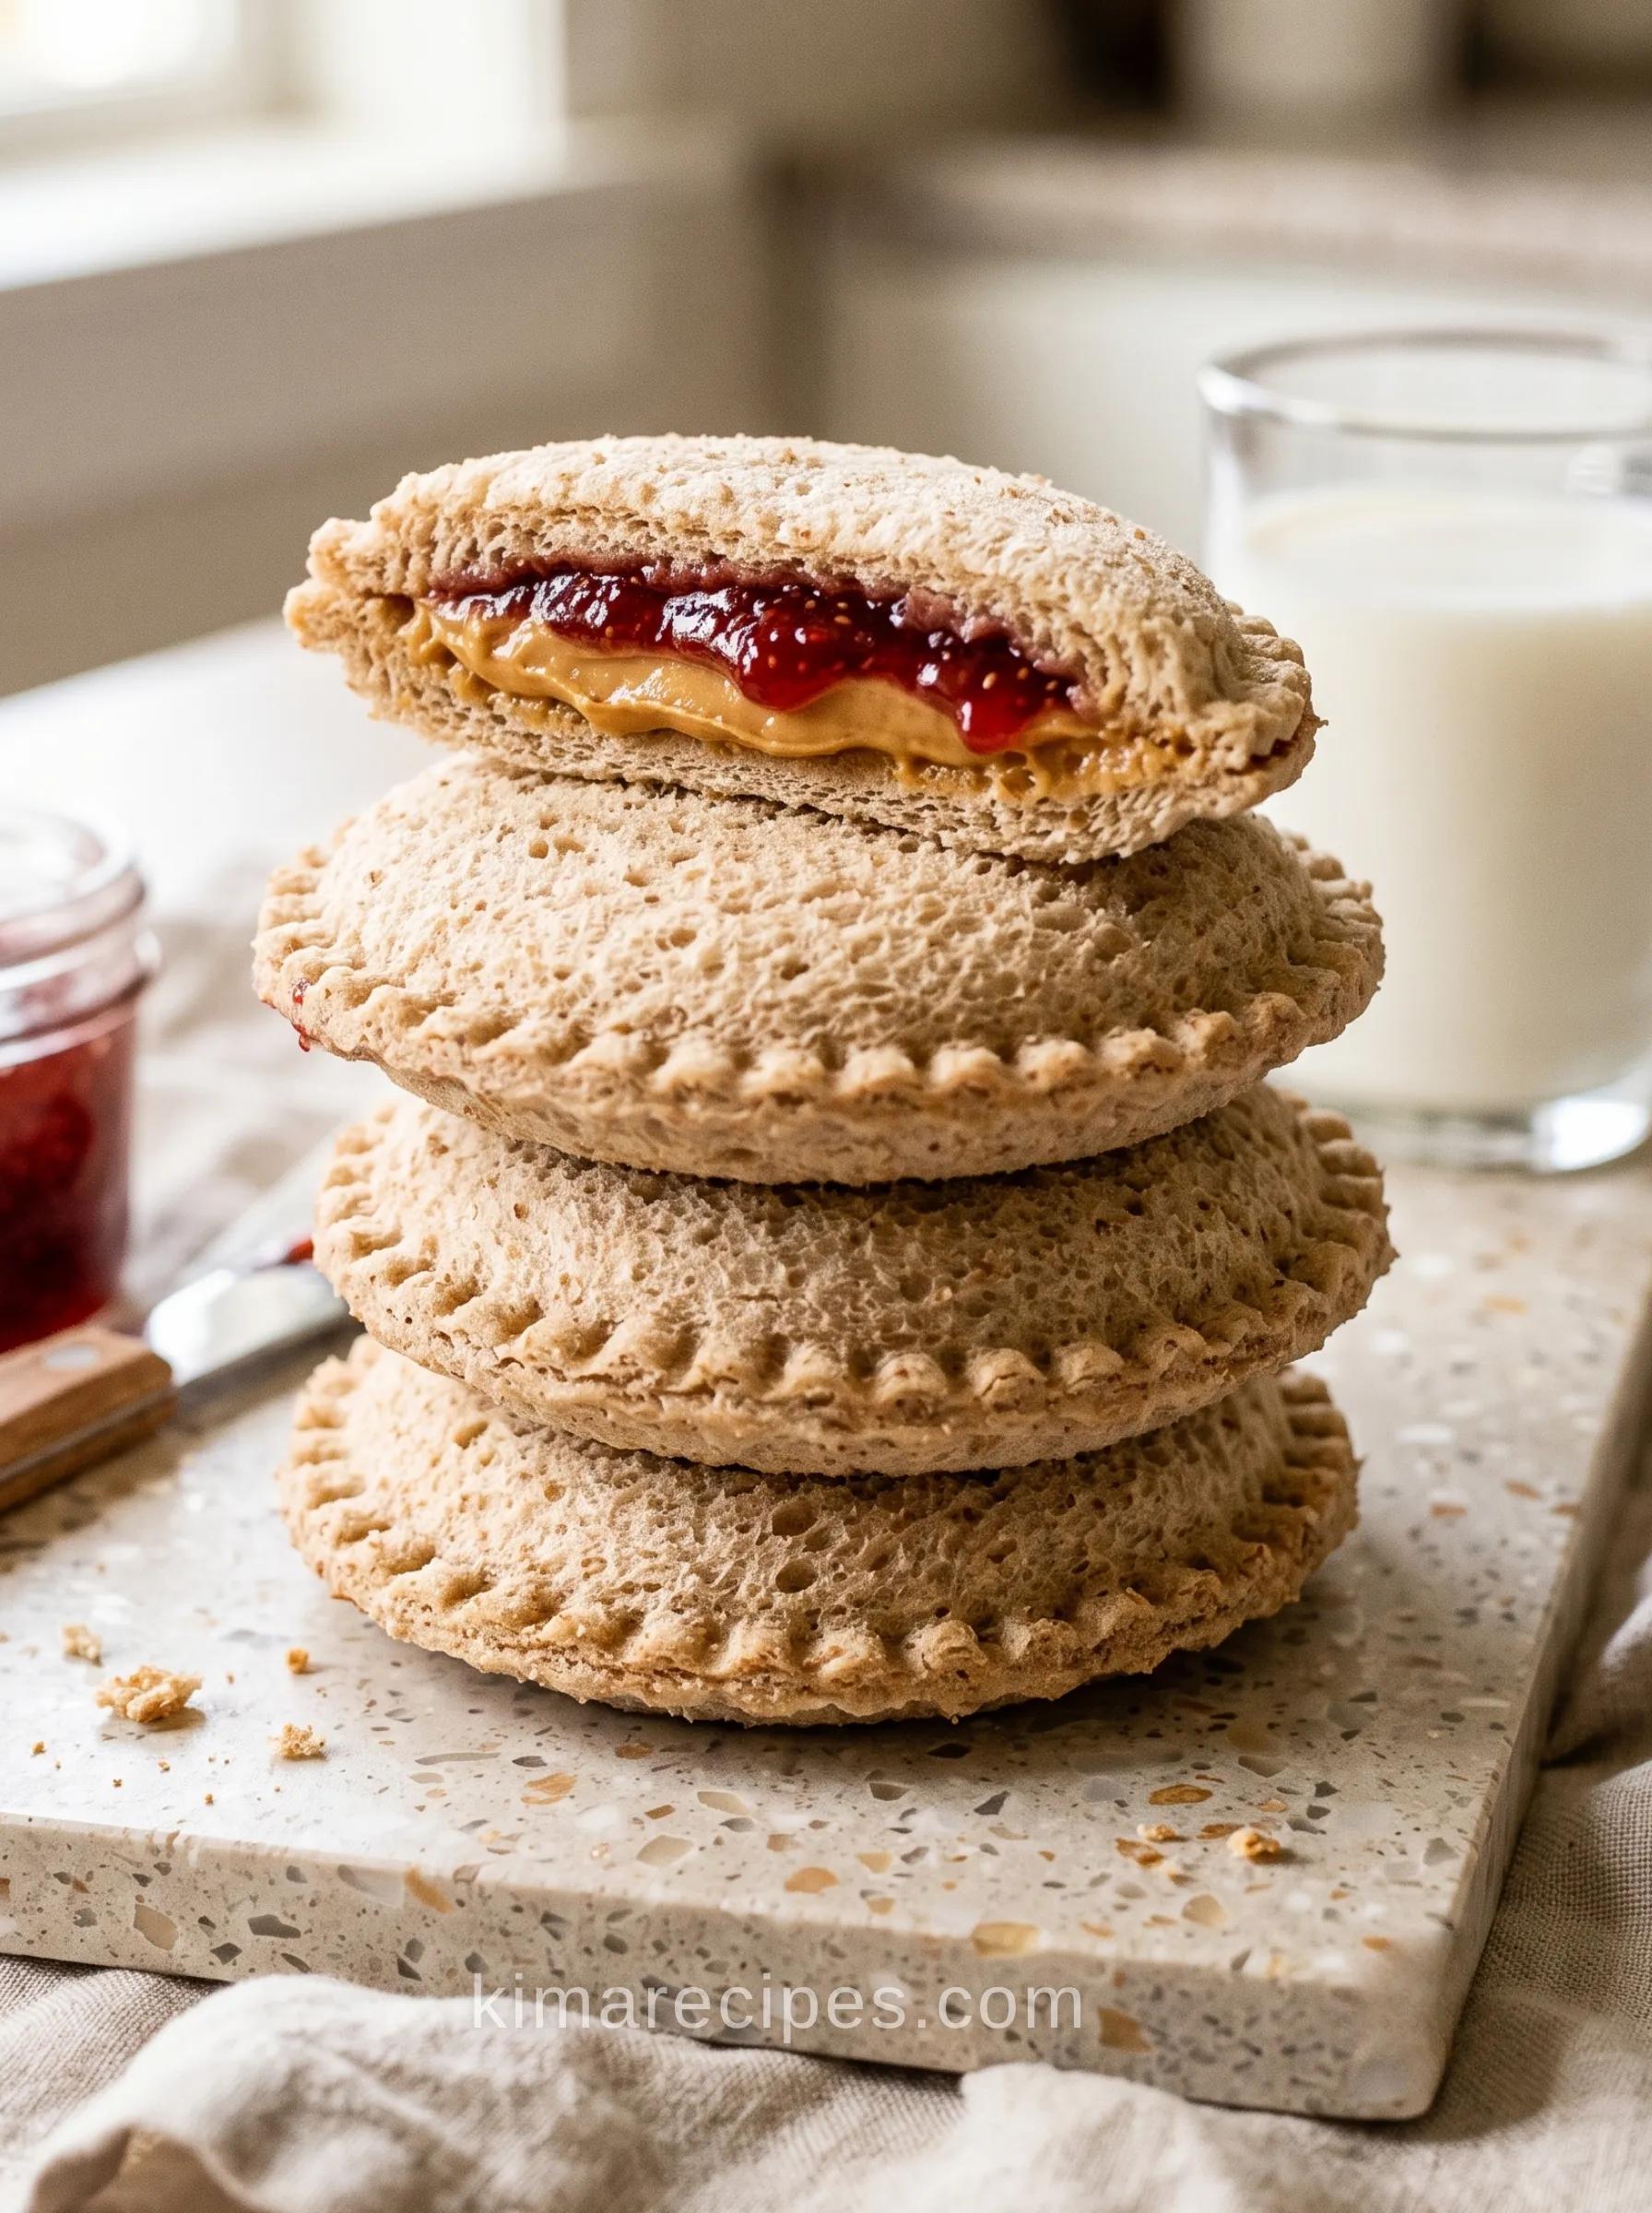
My freezer used to have a permanent spot reserved for the Smucker’s box. Then I did the math on what I was spending per sandwich and figured out I could make ten of these in the time it took to unload the dishwasher.
That’s really the whole pitch. Two slices of bread, a scoop of peanut butter, a spoonful of jelly, and a cutter you probably already own.
Why This Works
The crimped edge is doing more work than people give it credit for. Skip the crimping and the fillings work their way out the second the sandwich thaws — you end up with a soggy patch of jelly on one side and dry bread on the other. Press it firmly enough and the two halves basically fuse, which is why the frozen ones hold their shape straight out of the bag.
Bread choice matters more than the recipe cards let on, too. A softer sandwich bread crimps clean. Something dense or seedy tears at the edge instead of sealing.
Ingredients
- 2 slices whole wheat bread, or bread of choice — I used Nature’s Own
- 1–2 Tablespoons peanut butter, or other nut butter
- 1 Tablespoon jelly or jam, your favorite flavor
Instructions
- Lay out the slices of bread on a clean surface.
- Spread peanut butter evenly on one slice of bread.
- Spread jelly or jam evenly on the other slice.
- Place the jelly slice on top of the peanut butter slice, lining up the edges.
- Press down gently so the fillings spread out evenly, not just toward the middle.
- Use a round sandwich sealer, cookie cutter, or glass to cut a circle out of the sandwich — this takes the crusts off in the same motion.
- Press down firmly for a clean cut. Don’t saw at it.
- If you’re using a sandwich sealer, press the cutout piece into the sealer to crimp the edge shut.
- Using a cookie cutter or glass instead? Crimp the edge yourself with a fork, pressing firmly all the way around so nothing leaks.
Prep time: 10 minutes Total time: 10 minutes Servings: 1
Tips
- Room-temperature peanut butter spreads without tearing the bread. Cold-from-the-jar peanut butter drags and rips the slice, especially near the crust.
- Go light on the jelly. A heavy hand here is the difference between a clean sandwich and one that leaks the second it thaws.
- Crimp harder than feels necessary. The bread springs back a little, so a light press doesn’t actually seal it.
Variations
Swap in sunflower seed butter for nut-free lunchboxes — I’d skip almond butter here, it’s thinner and tends to seep past the crimp before it even hits the freezer. Strawberry jam is the obvious pairing, but a thin layer of honey with sliced banana works if you want something less sweet.
Make-Ahead
Wrap each one in plastic wrap or drop it in a sandwich bag. In the fridge they’re good for 2 days. In the freezer, a month — but don’t expect them to thaw evenly if you toss them straight in a lunchbox at 7am. Give them a couple hours, or overnight in the fridge if you’re packing lunches ahead.
FAQ
Can I make these gluten-free?
Yes — just use your favorite soft gluten-free bread. It won’t crimp quite as tightly as regular bread, so press extra firm around the edge.
Do I need a special sandwich sealer?
No. A round cookie cutter or even a drinking glass works for cutting the circle; you just finish the seal with a fork instead of the sealer’s built-in crimp.
Why did my sandwich leak in the freezer?
Almost always an undercrimped edge. If the fork marks look shallow, go over them again — you want visible ridges all the way around, not just a light press.
What bread works best?
Regular sliced sandwich bread, nothing too dense.
Closing Thoughts
These hold up fine straight from a cooler too, which makes them an easy thing to toss in a bag for a car trip without worrying about a jar of peanut butter tipping over.
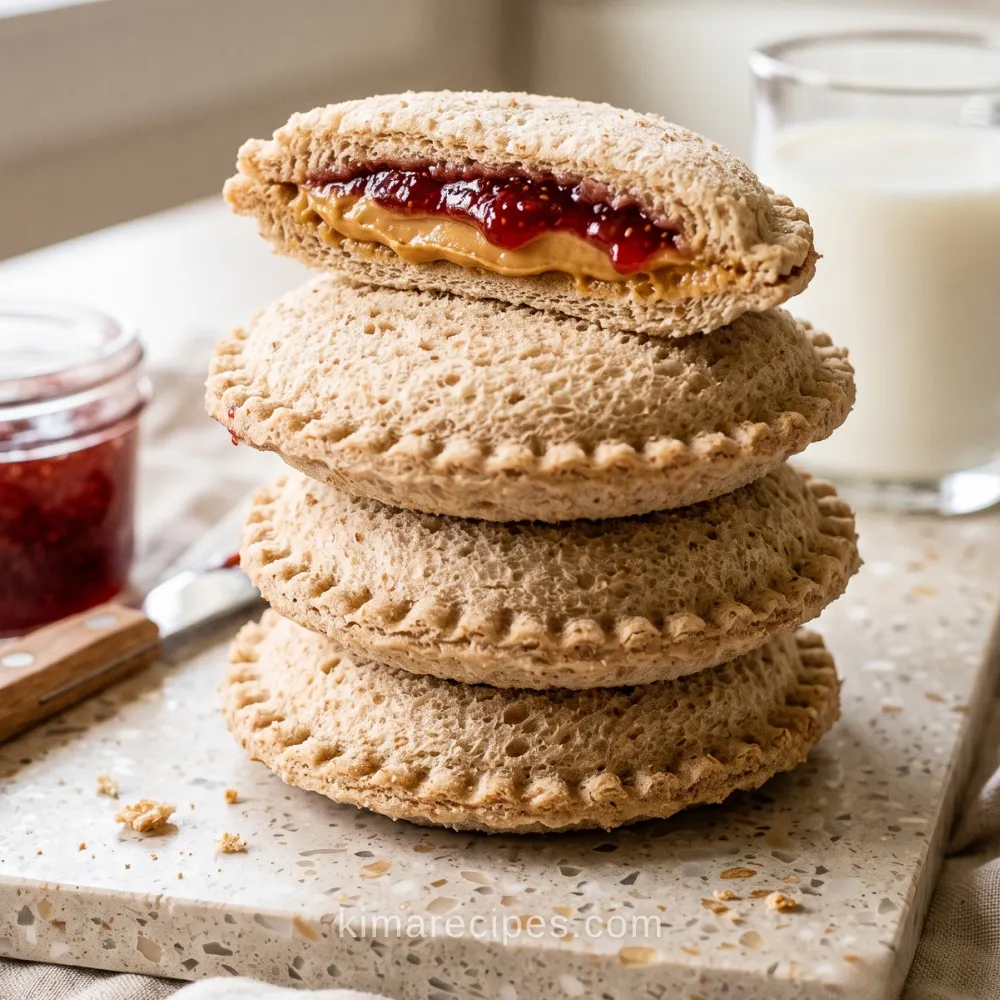
Homemade Uncrustables
These easy Homemade Uncrustables are made with soft bread, creamy peanut butter, and your favorite jelly. They take only 10 minutes to prepare and are freezer-friendly, portable, and perfect for lunch boxes, snacks, or meal prep.
Ingredients
Equipment
Method
Assemble the Sandwich
- Lay the two slices of bread on a clean cutting board or work surface.
- Spread the peanut butter evenly over one slice of bread, keeping it slightly away from the outer edges.
- Spread the jelly or jam evenly over the second slice of bread, also leaving a small border around the edges.
- Add thinly sliced strawberries, banana, or a small drizzle of honey, if desired.
- Place the jelly-covered slice on top of the peanut-butter-covered slice, with the filling sides facing each other. Align the edges and press down gently.
Cut and Seal
- Center a round sandwich cutter, cookie cutter, or drinking glass over the sandwich. Press down firmly to cut out a circle and remove the crusts.
- If using a sandwich sealer, insert the sealing piece and press firmly around the sandwich to close the edges.
- If using a cookie cutter or glass, crimp the entire edge of the bread circle firmly with the tines of a fork. Make sure the edges are completely sealed to prevent leaking.
- Serve immediately, refrigerate for later, or freeze according to the storage instructions.
Notes
- Soft bread: Fresh, soft bread seals more easily than dry or heavily toasted bread.
- Prevent leaking: Keep the peanut butter and jelly slightly away from the edges before sealing.
- Nut-free option: Replace the peanut butter with sunflower seed butter or tahini.
- Gluten-free option: Use your preferred soft gluten-free sandwich bread.
- Optional add-ins: Add thinly sliced strawberries, banana, or a small drizzle of honey. Avoid overfilling, or the sandwich may not seal properly.
- Refrigerating: Wrap the sandwich individually in plastic wrap or place it in a sealed sandwich bag. Refrigerate for up to 2 days.
- Freezing: Wrap each sandwich individually and freeze in a freezer-safe bag or container for up to 1 month.
- Thawing: Transfer a frozen sandwich to the refrigerator overnight or pack it frozen in a lunch box so it can thaw before eating.