The Best Fluffy Pancakes recipe you will fall in love with. Full of tips and tricks to help you make the best pancakes.

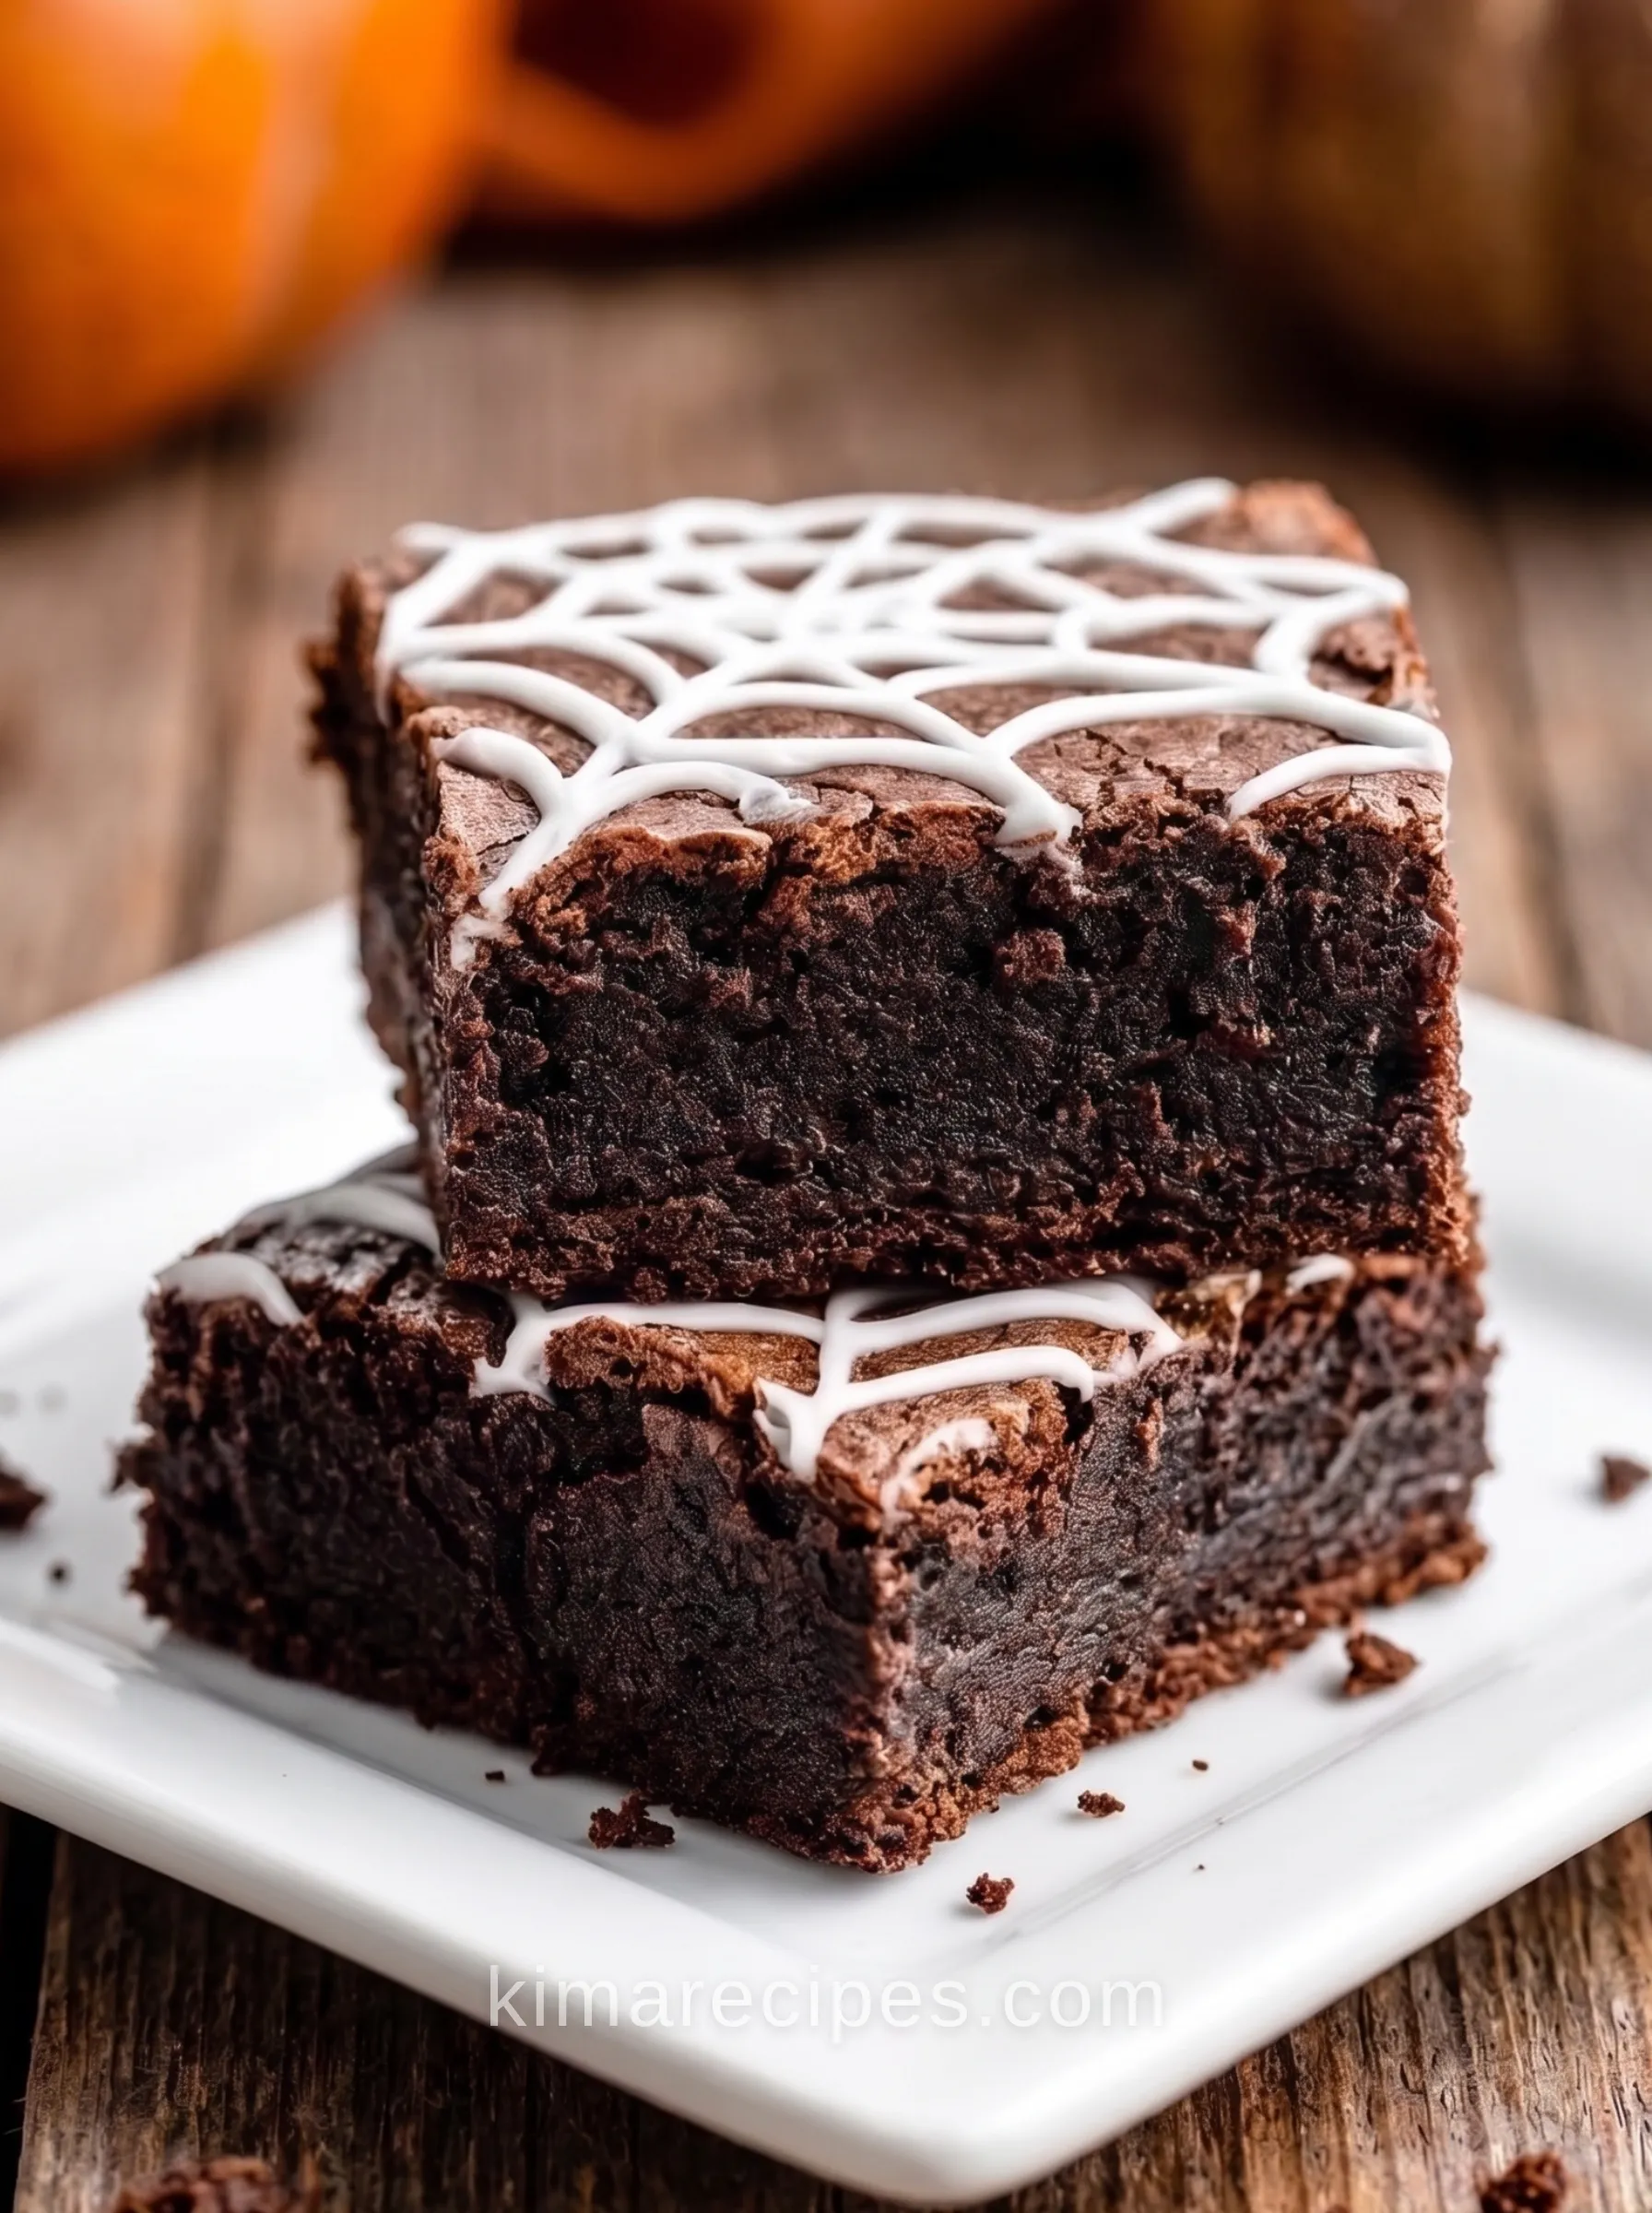
I wanted a brownie that didn’t taste like a Halloween prop — most spiderweb brownies I’d had before were dry enough to double as a coaster. This one starts from a real fudgy base, dark chocolate and butter melted together instead of cocoa-and-oil shortcuts, and the web goes on after the brownies are fully cooled so it doesn’t just melt into a puddle.
The result: dense, a little chewy at the edges, and a white chocolate web that actually holds its shape once it sets in the fridge.
Why This Works
Melting the butter and dark chocolate together first — instead of creaming butter and sugar the standard brownie way — is what gives these their fudge-like density. Whisking sugar and eggs directly into that warm chocolate mixture also helps dissolve the sugar into the batter rather than leaving it gritty, and it’s part of what forms that shiny, crackly top once baked.
Skip cooling the brownies fully before adding the web and you’ll watch it disappear — the white chocolate slides right into the still-warm surface instead of sitting on top of it. That’s also why the fridge set matters: 15-20 minutes firms the white chocolate enough that it holds a clean web line when you cut into squares.
Ingredients
- 1/2 cup unsalted butter
- 4 ounces high-quality dark chocolate, chopped
- 1 cup granulated sugar
- 2 large eggs
- 1 teaspoon vanilla extract
- 1/4 cup unsweetened cocoa powder
- 1/4 teaspoon salt
- 2 ounces white chocolate, chopped
Instructions
- Preheat the oven to 350°F (175°C). Grease and line an 8×8-inch baking pan with parchment paper.
- In a microwave-safe bowl or double boiler, melt the butter and dark chocolate together until smooth. Let it cool slightly — you don’t want to scramble the eggs in the next step.
- Whisk the granulated sugar, eggs, and vanilla extract into the chocolate mixture until well combined.
- In a separate bowl, whisk together the cocoa powder and salt.
- Fold the dry mixture into the wet mixture gradually, just until combined. Overmixing here is how you lose the fudgy texture.
- Pour the batter into the prepared pan and smooth the top.
- Bake 25-30 minutes, until a toothpick comes out with a few moist crumbs still clinging to it.
- Let the brownies cool completely in the pan. Don’t skip this — the web won’t set right on a warm surface.
- Melt the white chocolate in the microwave or over a double boiler.
- Transfer the melted white chocolate to a small piping bag, or a zip-top bag with a tiny corner snipped off.
- Using a toothpick or a fine-tipped tool, drag lines from the center of the brownies out to the edges.
- Connect those lines with a wave-like motion to form the web pattern.
- Refrigerate the brownies for 15-20 minutes so the white chocolate sets.
- Lift the brownies out of the pan using the parchment paper edges.
- Cut into squares and serve.
Prep Time: 20 minutes Cook Time: 30 minutes Total Time: 50 minutes Yield: 12 brownies
Tips
- Chop the dark chocolate finely so it melts evenly with the butter — big chunks take longer and risk scorching.
- Pipe the web lines quickly once the white chocolate is melted; it firms up fast and gets harder to drag into clean lines the longer it sits.
- A toothpick gives more control than a knife tip for connecting the web lines — less chance of dragging chocolate where you don’t want it.
Variations
Some bakers swap the white chocolate web for a thin caramel drizzle instead — skip that one if you’re going for the classic Halloween look, since caramel doesn’t hold a crisp web line the way white chocolate does. Adding a handful of espresso powder to the batter is worth trying if you want a deeper chocolate flavor without any coffee taste coming through.
Make-Ahead Notes
Bake the brownies up to two days ahead and store them plain, without the web, at room temperature in an airtight container. Add the white chocolate web the day you’re serving them — it doesn’t hold up well to being stored and re-chilled, and the lines start to blur.
FAQ
Can I use milk chocolate instead of dark chocolate for the base?
You can, but it’ll shift these from fudgy-and-rich to noticeably sweeter, and the color contrast with the white chocolate web won’t be as sharp.
Why did my white chocolate seize when I melted it?
Usually water — even a drop from a wet spoon or bowl can cause white chocolate to seize into a grainy clump. Melt it low and slow, and keep every tool completely dry.
Do I need a piping bag for the web design?
No — a zip-top bag with one corner snipped is the way I do it most of the time. It’s less mess to clean up and works just as well as a real piping bag for a design this simple.
How do I store leftover spiderweb brownies?
Room temperature, airtight container, up to 3 days.
Closing Thoughts
These hold up well cut smaller than a standard brownie square — the web pattern actually reads better in bite-sized pieces on a dessert table than in one big square.
Spiderweb Brownies
These Spiderweb Brownies are rich, fudgy dark chocolate brownies decorated with an eye-catching white chocolate spiderweb design. Perfect for Halloween parties and spooky-season desserts, they combine an intensely chocolatey brownie base with a simple festive decoration.
Ingredients
Equipment
Method
Prepare the Pan
- Preheat the oven to 350°F (175°C). Grease an 8×8-inch baking pan and line it with parchment paper, leaving enough overhang to lift the brownies out later.
Make the Brownie Batter
- Melt the unsalted butter and chopped dark chocolate together in a microwave-safe bowl or double boiler, stirring until completely smooth. Allow the mixture to cool slightly.
- Whisk the granulated sugar, eggs, and vanilla extract into the melted chocolate mixture until well combined.
- In a separate bowl, whisk together the cocoa powder and salt.
- Gradually fold the cocoa mixture into the wet ingredients just until combined. Avoid overmixing.
- Pour the brownie batter into the prepared baking pan and smooth the top into an even layer.
Bake and Cool
- Bake for 25–30 minutes, or until a toothpick inserted into the center comes out with a few moist crumbs attached.
- Place the pan on a cooling rack and allow the brownies to cool completely before decorating.
Create the Spiderweb
- Melt the chopped white chocolate in the microwave or in a double boiler until smooth.
- Transfer the melted white chocolate to a small piping bag or zip-top bag and snip off a very small corner.
- Pipe the white chocolate over the cooled brownies to begin forming the spiderweb pattern.
- Using a toothpick or another fine-tipped tool, gently drag lines from the center of the design toward the edges.
- Connect the lines with curved or wave-like lines to create the spiderweb effect.
Chill and Serve
- Refrigerate the decorated brownies for 15–20 minutes, or until the white chocolate has set.
- Lift the brownies from the pan using the parchment paper overhang.
- Cut into 12 squares and serve.
Notes
- Timing: The source lists a total time of 50 minutes, which accounts for the 20-minute prep and 30-minute bake only. The brownies must also cool completely and chill for 15–20 minutes after decorating, so the actual total time is longer.
- Cooling: Allow the brownies to cool completely before adding the white chocolate. Decorating warm brownies can cause the chocolate design to melt or lose definition.
- Fudgy texture: Remove the brownies when a toothpick inserted into the center comes out with a few moist crumbs rather than completely clean.
- Do not overmix: Fold the dry ingredients into the wet mixture only until combined to help maintain a tender, fudgy texture.
- White chocolate: Melt the white chocolate gently and stir frequently to prevent scorching.
- Piping: Snip only a tiny corner from the piping bag so the spiderweb lines remain thin and controlled.
- Spiderweb design: A toothpick or fine skewer works well for dragging and shaping the white chocolate into a web pattern.
- Chilling: Refrigerate for 15–20 minutes after decorating so the white chocolate firms before slicing.
- Storage: Store brownies in an airtight container at room temperature for a few days or refrigerate for longer storage.